Heroku makes it easy and free to deploy SpringBoot apps with database connectivity on their servers. This is useful for hosting personal projects/websites to show off your skills.
In this article, I will walk you through the process of deploying a SpringBoot app with PostgreSQL on Heroku.
Before I start, here are a few things you should know.
-What is Heroku?
-Heroku is a platform as a service (PaaS) that enables developers to build, run, and operate applications entirely in the cloud.
-How do I add a database to the app?
-With Heroku's free add-ons Heroku Postgres/JawsDB MySQL/JawsDBMaria we can attach as a database.
Here, I will use the Heroku Postgres to demonstrate.
In Section A, we will set up a Heroku app with Postgres and test database connection in local machine,
In Section B, we will deploy the app on Heroku and run.
So let's begin,
Section A
1. You will need a Heroku account. Sign up for free from this link
2. Go to Heroku Dashboard and click on new/create new app

3. Give your app a unique name and create the app. It will take you to the new app’s dashboard.
4. Now click on resources. From the Add-ons section’s search bar search for Heroku Postgres. Add Heroku Postgres to the app that you created.
5. Click on Heroku Postgres and go to its settings section. Under the Database Credentials click on View Credentials. It will show you your new database host, name, user, password, etc.

6. Update your application.properties with this new database credentials.
7. Run your SpringBoot app locally to test the connection.
Don’t forget to set
spring.jpa.hibernate.ddl-autoto create for the first time you run your application.
Also, you can use HeidiSQL to access the database.
Section B
Now that your connection is working, its time to deploy the app in Heroku.
1. Go to Heroku Dashboard
Click on the name of your app and go to the Deploy tab. There is a short guide to deploy. Let's follow those steps.
2. Download and install Heroku CLI for your local machine from this link
3. Goto your Springboot project’s root directory and open terminal in the directory.
4. Type
heroku loginand press enter.

Upon clicking on any key it will pop up your browser and let you authenticate. Click the Log In button.

You can close the browser window after logging in.
5. In the terminal type and enter
git initcommand to create a git repository.
6. Type
heroku git:remote -a test-nb-heroku7. Replace test-nb-heroku with your apps name of Heroku. Press enter.
8. Type and enter these git commands below
git add .
git commit -am "make it better"
git push heroku master
After the push command, it will take some time to push the changes to Heroku.
When Push is done it will automatically build the app and run on the Heroku server.
It will look something like this image below.

You can close the terminal now.
9. Go to, Heroku Dashboard and click on your app
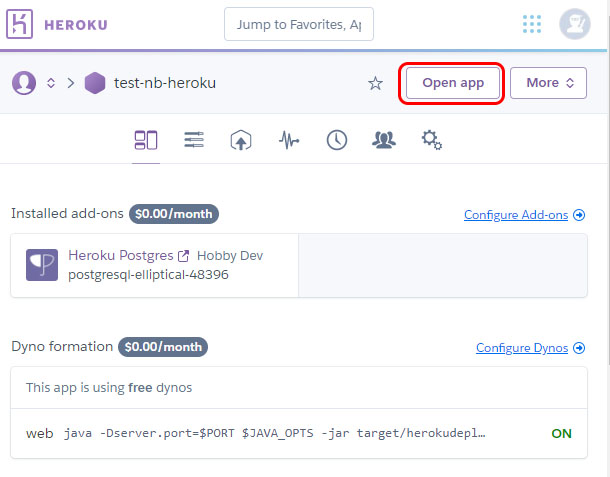
10. Click on Open app button like the image below

Finally, you can see your app run on Heroku's server.

